Proven Methods to Play Disney Plus Videos on Smart Projectors
With the advancement of technology, smart projectors are becoming more and more popular with the public. Smart projectors make watching Disney movies enjoyable, delivering them with lifelike visuals and room-filling sound. Imagine a smart projector that allows the whole family to enjoy Disney Plus' wide variety of movie and television content together, or to enjoy it outdoors when camping, or to gather together to create a warm experience and unforgettable memories when objective conditions prevent them from going out to watch movies.

Whatever the location, smart projectors bring an edge to the average Disney movie experience. Some are incredibly easy to set up and use and combine powerful image enhancement features with theater-like sound for an immersive experience.
As mentioned above, the smart projectors bring a top-notch cinematic experience to the Disney movie recommendations. The methods to access your favorite Disney movies on a projector are different. You can choose the projection method that suits your personal needs.
Methods to Put Disney Plus on Smart Projector
In reality, there are several methods for streaming Disney plus through a projector, including HDMI, Chromecast, screen mirroring, WiFi, and so on. Some smart projectors run on integrated operating systems like Android TV, granting you access to thousands of apps via Google Play. With Android TV, you can download streaming apps like Disney+, where you will find endless entertaining movies. Smart projectors also have multiple connection ports, such as HDMI, USB, LAN, and audio jack, enabling you to connect smartphones, laptops, flash drives, gaming consoles, TV sticks, etc.
- Method 1. Use the Disney Plus App to Watch Disney Plus on a Projector
- Method 2. Use HDMI to Watch Disney Plus on a Projector
- Method 3. Use Google Chrome and Android TV to Play Disney Plus on a Projector
- Method 4. Use Airplay to Play Disney Plus on a Projector
- Method 5. Without the Internet, How to Play Disney Plus Videos on Projector via USB [Recommended]

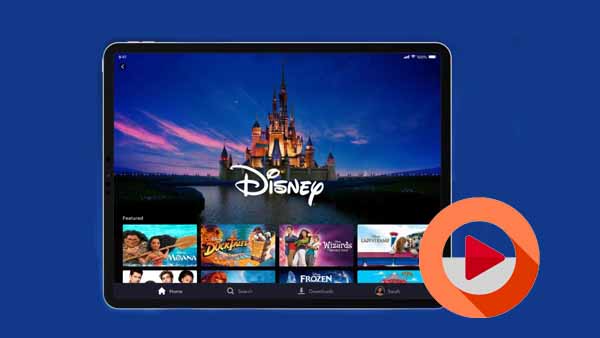
How to Use Disney+ App to Watch Disney+ on A Projector
This method is the easiest and most straightforward of all, but there are limitations. The Disney Plus app is pre-installed on the great majority of Smart Projectors. If you are not sure if your device is supported, please check the manufacturer’s website first. These extra features are provided via applications that are either pre-installed or may be downloaded and installed straight into the projector via WiFi.
The following actions may be taken to stream Disney plus on a Smart Projector:
- On the Smart projector, turn it on.
- Connect the Smart projector to your home WiFi network or connect it to your smartphone.
- Start the Disney plus app. If your Smart Projector does not already have the Disney plus app installed, follow the manufacturer’s instructions to download and install it.
- Sign in to Disney plus (you will not need to do this again if you have already signed in to Disney plus on the Smart Projector).
- Choose your favorite TV show or Hollywood movie, then sit back and unwind!
How to Use HDMI to Watch Disney+ on A Projector
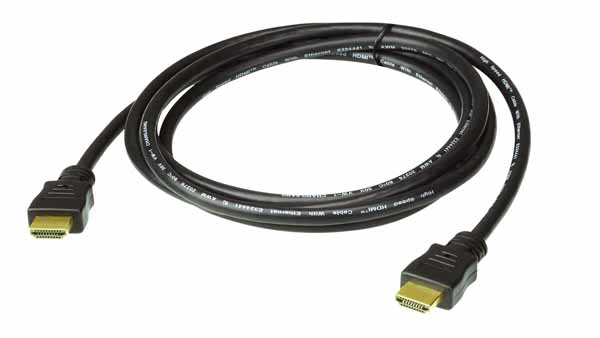
You can use an HDMI cable to connect and stream Disney+ to your TV using a phone, tablet, or computer.
To enjoy the highest quality Disney+ experience all components, including HDMI cables, must be compatible with high-bandwidth digital content protection.* External displays must be HDCP 2.2 compliant to view 4K Ultra HD and HDR content. Older video and audio components may affect quality or prevent playback altogether.
To watch Disney plus on a projector through HDMI, you can follow the next guide:
- Turn on your projector.
- Change the projector’s Source setting to HDMI.
- Insert your HDMI-capable device into the projector’s HDMI port on the rear.
- Turn on the HDMI device, such as a laptop, Chromecast, or Amazon Fire TV Stick (other devices are available, but first check the manufacturer’s website).
- Tether the HDMI device to your home WiFi or your mobile phone.
- Start the Disney plus app. If your device does not already have the Disney plus app, follow the manufacturer’s instructions for downloading and installing it.
- Sign in to Disney+ (you will not need to do this again if you have already signed in to Disney+ on the device).
- Choose your favorite TV show or Hollywood movie, then sit back and unwind!
Why won’ t Disney Plus play through HDMI?
The cable does not connect to Disney Plus. You need to have a device connected to DISNEY+ App which is receiving the signal via a WiFi or cable connection, then your HDMI cable can connect to your TV.
How to Use Google Chrome and Android TV to Play Disney plus on a Projector?
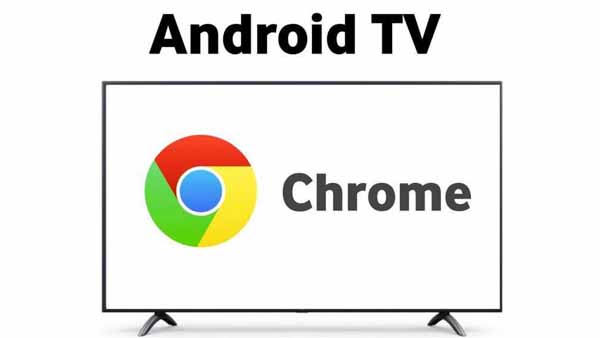
Casting Disney Plus to a projector from your Android TV or via Google Chrome is another easy way to watch it. Essentially, this allows you to utilize your device with Google Chrome installed to control the projector’s output as if it were remote control.
Using Google Chrome, you can stream Disney Plus to a Smart Projector running Android TV by following these steps:
- On the Smart projector, turn it on.
- Connect the Smart projector to your home WiFi network or connect it to your smartphone.
- Sign in to Disney plus on your laptop or desktop computer using Google Chrome.
- Choose the TV show or movie you want to watch, then right-click the tab in Google Chrome and click the three vertical dots in the upper right corner.
- Pick Cast from the drop-down box, and then select the Android TV-enabled Smart projector.
- The Disney+ material should start playing on the Smart Projector.
- Choose your favorite TV show or Hollywood movie, then sit back and unwind!
Please note that you need to check your manufacturer’s website for compatibility with this option.
How to Use Airplay to Play Disney Plus on a Projector?
Apple AirPlay lets you broadcast video from your iOS smartphone to an AirPlay-capable projector. Please check the manufacturer’s website to determine if your smart projector is Apple AirPlay-compatible. If not, you may attach an Apple TV to the projector’s HDMI connection to give it this capability.
Follow the instructions below to stream Disney+ video to your smart projector through AirPlay:
- Make sure your smart projector and iOS smartphone are connected to the same Wi-Fi network.
- Open the Disney plus app on your iOS device.
- Select the TV show or movie you want to watch and hit Play.
- You should notice the AirPlay symbol in the upper right corner after a single tap on the video.
- To access the Control Center, swipe down from the upper right corner of your iOS device.
- Find the AirPlay control.
- Tap the AirPlay button once.
- Select the smart projector or Apple TV that is linked to your projector.
Please note that, your projector will immediately start playing the Disney plus TV program or movie. Please keep in mind that Disney+ supports AirPlay on Apple TV (running tvOS 11.0 or above), 3rd and 4th generation Apple TV, and TVs that support AirPlay 2.
Without the internet, How to Play Disney Plus Videos on a Projector via USB
Most modern projectors have USB-C-type cables that are used by smartphones and tablets, they will allow you to directly interface your projector with your device - in turn gaining access to excellent data transfer speeds and power supply capabilities. If you don’t have internet or want to play Disney Plus videos for offline watching, the method to download Disney Plus videos and copy these videos to USB is highly recommended. Kigo DisneyPlus Video Downloader is the tool to help you download various movies, TV shows or documentaries from Disney Plus to your computer in MP4 or MKV format and then transfer them to a USB drive or SD card as you like.
Kigo Disney+ Video Downloader
- Download movies, and TV shows including original series from Disney Plus.
- Save Disney+ videos to MP4 / MKV format.
- Select some or the whole audio tracks and subtitles to keep.
- Download Disney+ HD videos.
- Support 5.1 audio kept.
- Save up to 75% time compared to screen recording type programs.
- Fast speed and easy to operate.
100% Secure
100% Secure
Please note that the software interface may be updated and we recommend checking the official tutorials for the latest instructions.
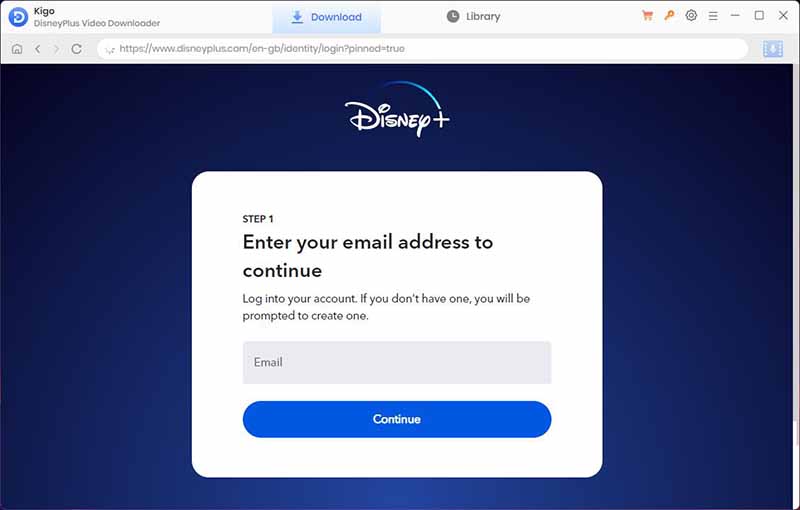
Step 1. Login with Disney+ Account.
Install and launch it, then login with your Disney+ account to go on.
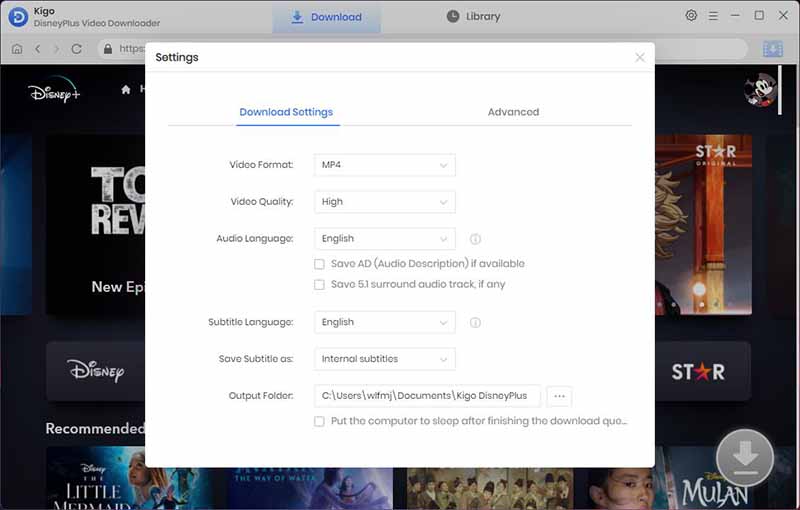
Step 2. Select Basic Settings.
Click on the Settings icon on the top right corner of the window to set the output format (MP4 / MKV), video quality (Low, Medium / High), and so on. Here we choose MP4 as the output video format.
Step 3. Add Disney+ Video to Kigo.
Browse or search for the video in the search box by video title. Open the video details page, and when you click the "Download" button, Kigo will automatically parse all the information about the TV series.
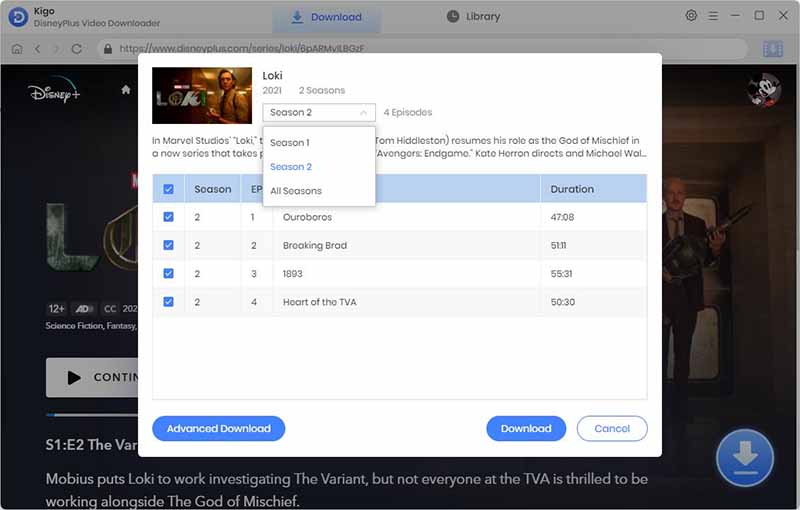
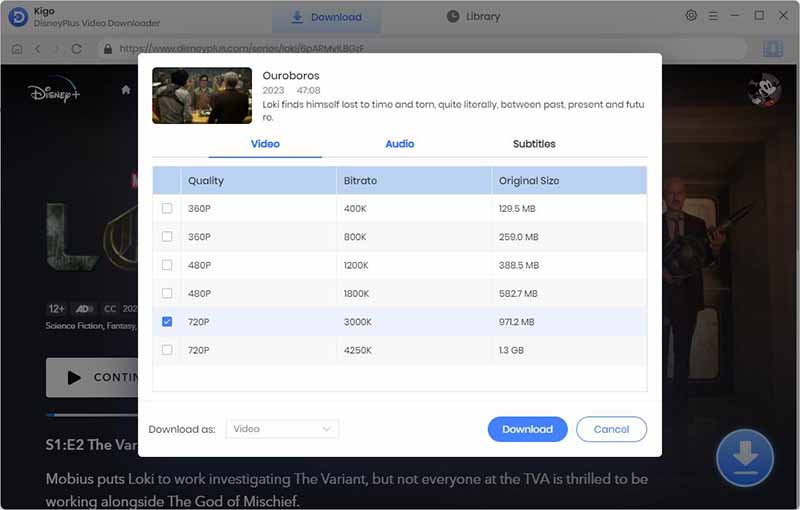
Step 4.Select "Advanced Download" Settings.
Click "Advanced Download" in the bottom left corner to select the video quality, audio track language and subtitle language.
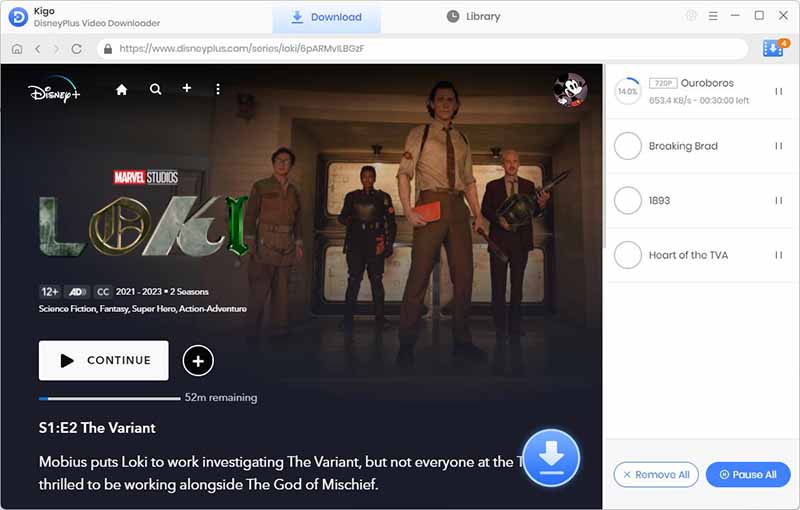
Step 5. Start to Download Disney+ Videos.
After completing the above settings, click the "Download" button to start downloading video from Disney+.
Step 6. Transfer Downloads to a USB for Projectors.
Now you can click "Library" - "Folder icon" to locate the downloaded videos quickly. On Windows computers, connect a standard USB-A cable to your computer, and plug the other end into the projector's USB port. First, make sure your USB flash drive is 32 GB or lower for the projector to read it. Then it is recommended that the flash drive should be formatted to FAT32 for the best results for the projector.
Final Words
Depending on the version and technology of the projector, there are different ways to play Disney Plus videos on the projector. If your projector supports the installation of the embedded Disney Plus app, then playing directly through the Disney Plus app is the easiest way to do so in an environment with good internet access. For offline viewing and on-the-go viewing, using Kigo DisneyPlus Video Downloader to download Disney Plus videos and transfer them to a USB for playback on the projector later is a great solution. Even if your projector is not the latest version, downloading Disney Plus videos to a USB is a great option.
100% Secure
100% Secure
Useful Hints
Kindly be aware that the trial version allows downloading only the initial 5 minutes of each video. To fully enjoy the complete video, we recommend purchasing a license. We also encourage you to download the trial version and test it before making a purchase.
Videos from Disney™ are copyrighted. Any redistribution of it without the consent of the copyright owners may be a violation of the law in most countries, including the USA. KigoSoft is not affiliated with Disney™, nor the company that owns the trademark rights to Disney™. This page is provided for compatibility purposes only, and in no case should be considered an endorsement of KigoSoft products by any associated 3rd party.
Highly Recommended: Kigo Movie One
15-in-one Video Downloader for Netflix, Prime Video, Disney+, YouTube Video, Facebook, and more, and save videos in MP4 or MKV format! Learn More


Ashley Rowell, a senior staff writer, is an expert in video and audio subjects, specializing in streaming video and audio conversion, downloading, and editing. She has a deep understanding of the video/audio settings for various devices and platforms such as Netflix, Amazon Prime Video, Disney Plus, Hulu, YouTube, etc, allowing for customized media files to meet your specific needs.